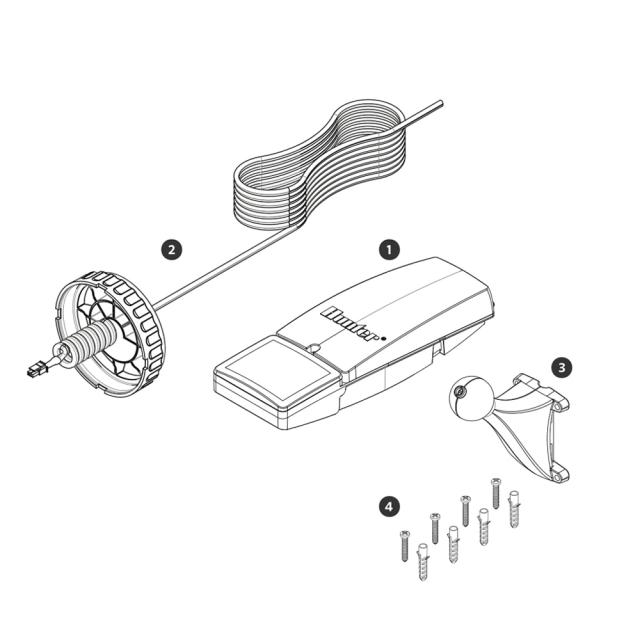
- Solar Panel
- 40' (12 m) Cable and WVL Solar End Cap Connection
- Solar Panel Ball Mount
- Wall-Mount Hardware
-
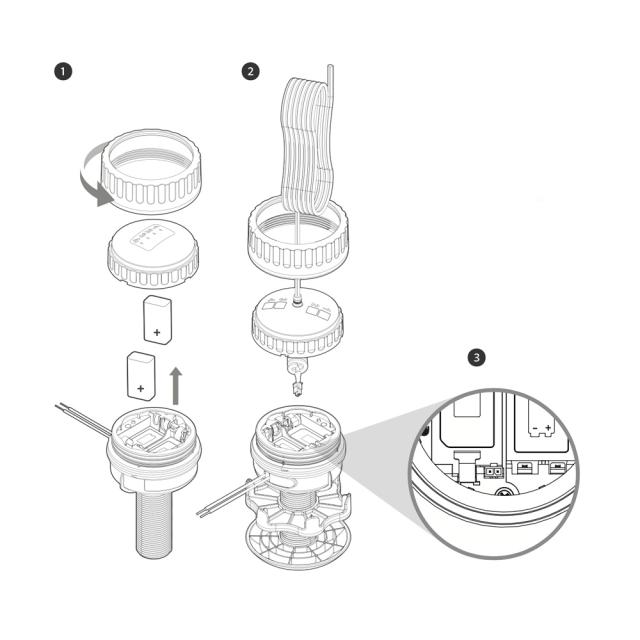
Remove the lock nut, end cap, and 9 V batteries from the existing Wireless Valve Link.
-
Feed the entire bundle of Solar Panel wire through the end cap lock nut.
-
Plug cable into connector within Wireless Valve Link battery compartment.
-
Install the Solar Panel end cap in the Wireless Valve Link body and tighten the lock nut to secure in place.
-
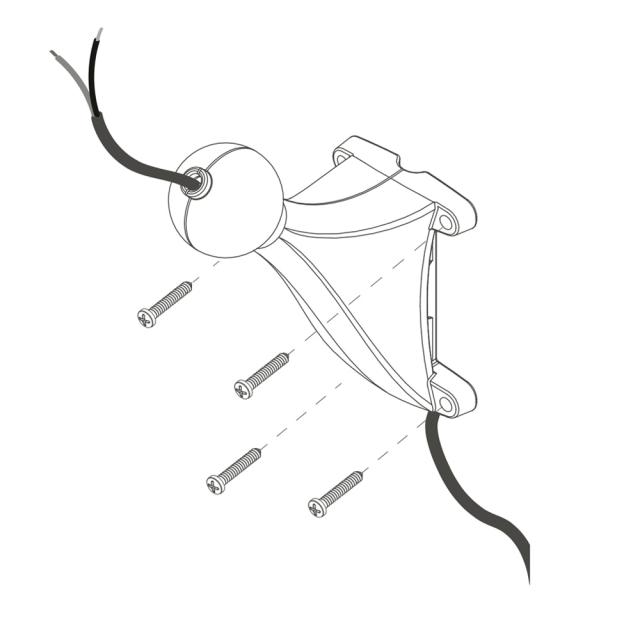
Feed the red and black wires up through the Solar Panel ball mount.
-
Install the ball mount where the Solar Panel will be located using one of the following methods:
-
Use the four included screws and anchors for drilling into a wall or flat surface.
-
Use hose clamps or zip ties to attach to any round surface (e.g., pole, post, stake, pipe).
-
Open the Solar Panel cover and attach the Solar Panel over the ball mount. Make sure the red and black wires are coming through the ball mount into the Solar Panel housing and have enough slack to reach the (+) and (–) terminals.
-
Position the Solar Panel in the desired location and tighten the three screws around the ball mount to secure it in place.
-
Feed the wires through the waterproof grommet and attach the red wire from the cable to the red (+) terminal screw and the black wire to the black (–) terminal screw.
-
Ensure the rechargeable battery pack within the Solar Panel is installed and connected properly.
-
Close the Solar Panel cover and tighten the screw to seal the housing.
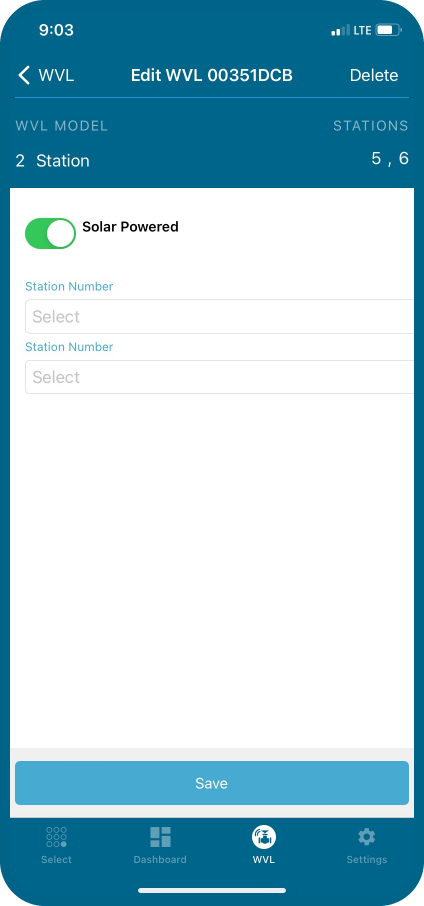
When using the Solar Panel with a Wireless Valve Link, use the Bluetooth® enabled Hunter Wireless Valve Link App to designate the Wireless Valve Link as "Solar Powered."
-
Open the App.
-
Connect to the Wireless Valve Output Module (WVOM).
-
Select the WVL menu.
-
Toggle the Solar Powered switch to an active state when editing an existing or adding a new Wireless Valve Link. The Dashboard Details menu will indicate battery health with a solar icon for all Wireless Valve Links powered by solar.
Still need help? We're here.
Tell us what you need support with and we'll find the best solution for you.