The Universal Antenna Extension Kit is beneficial for improving line-of-sight wireless communication for Wi-Fi, cellular, and LoRa radio communications. This kit (ANT-EXT-KIT) is for use with a variety of Hunter antennas and wireless modules:
Wi-Fi
-
ACC2 Controllers – A2C-WIFI Module
-
HCC Controllers – Removable antenna within facepack
Cellular
-
ACC2 Controllers – A2C-LTEM Cellular Connection Module
LoRa Radio
- Wireless Valve Link (WVL) – Domestic Wireless Valve Output Module and international "E" version
-
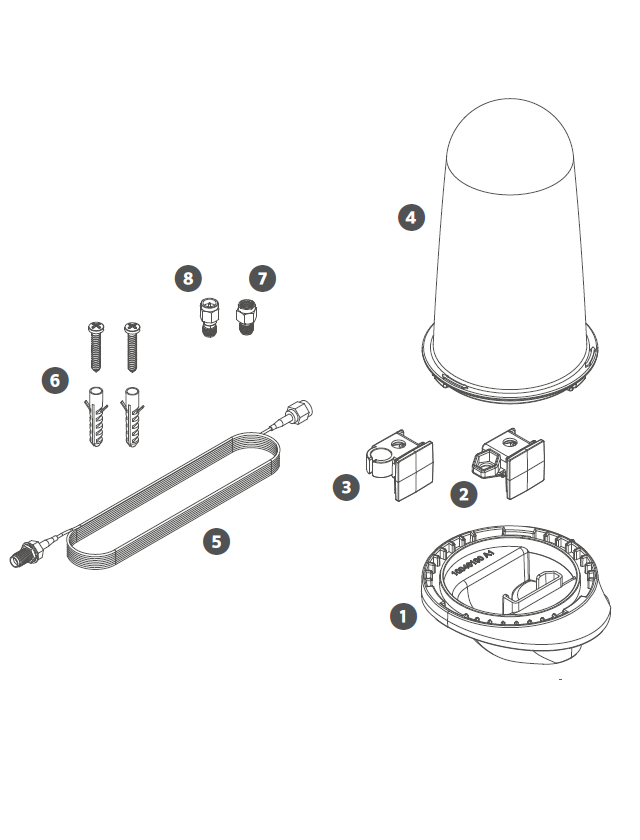
Antenna Mount Base
-
Antenna Mount Adapter
-
A2C-WIFI Antenna Mount Adapter
-
Antenna Mount Cover
-
9' (3 m) Cable Extension
-
Wall Mounting Screws and Anchors
-
SMA Adapter A
(RP-SMA Male x SMA Female) -
SMA Adapter B
(SMA Male x RP-SMA Female)
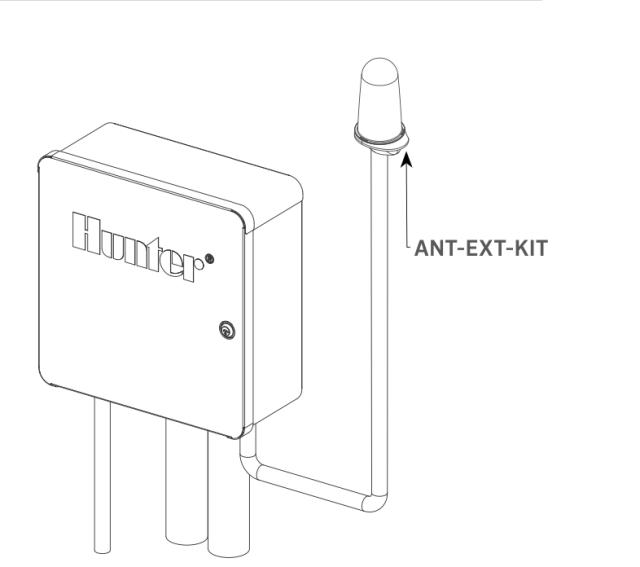
The Universal Antenna Extension Kit is designed to be installed on top of 3⁄4" (20 mm) of electrical conduit or PVC pipe. It can also be mounted to a wall using the included screws and wall anchors. This will prevent any damage to the wire and/or antenna connectors.
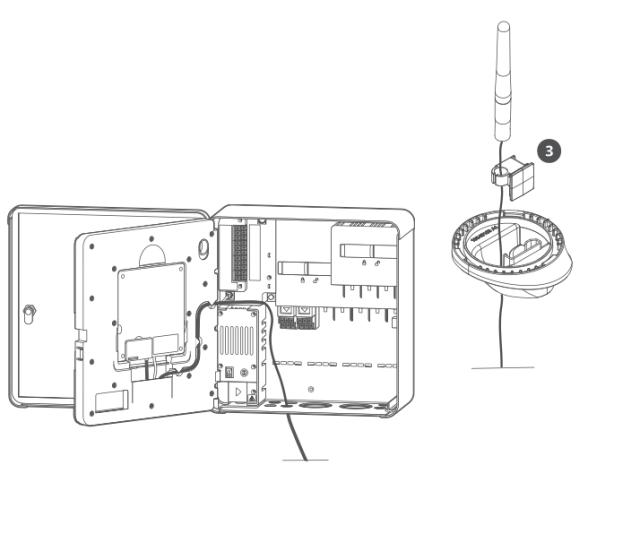
A2C-WIFI Module
-
Remove the existing antenna from the A2C-WIFI Module.
-
Thread the male end of the extension cable to the A2C-WIFI Module.
-
Route the cable out of the cabinet to the desired mounting location.
-
Feed the other end of the cable up through the bottom of the antenna mounting base and thread onto the original antenna.
-
Position the A2C antenna mount adapter (component #3) as shown, and secure the antenna in place using the adapter.
-
Insert the antenna mount adapter within the mounting base.
-
Attach the antenna mount cover to the base by twisting the two pieces together clockwise.
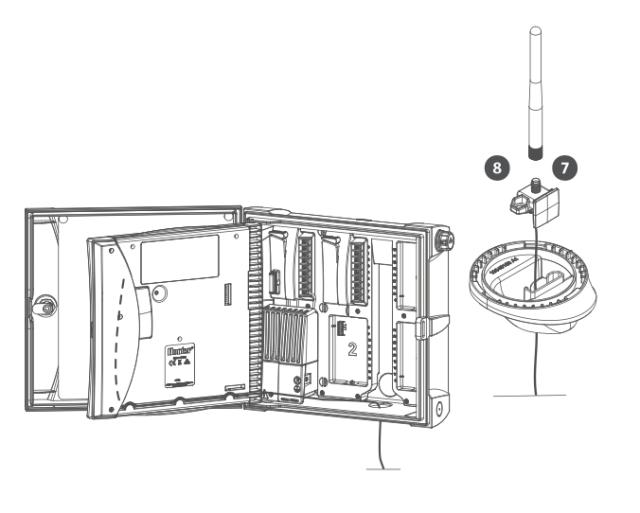
HCC Wi-Fi Antenna
-
Remove the plastic cover (three screws) from the back of the HCC facepack and remove the existing Wi-Fi antenna.
-
Thread SMA Adapter A (component #7) onto the male end of the extension cable.
-
Connect the extension cable to the antenna connector within the facepack, and route the cable out of the cabinet to the desired mounting location.
-
Install SMA Adapter B (component #8) on the other end of the cable and feed the cable up through the bottom of the antenna mounting base.
-
Position the antenna mount adapter as shown, and secure the cable in place using the locknut on the connector.
-
Reinstall the Wi-Fi antenna and insert the antenna mount adapter in place within the mounting base.
-
Attach the antenna mount cover to the base by twisting the two pieces together clockwise
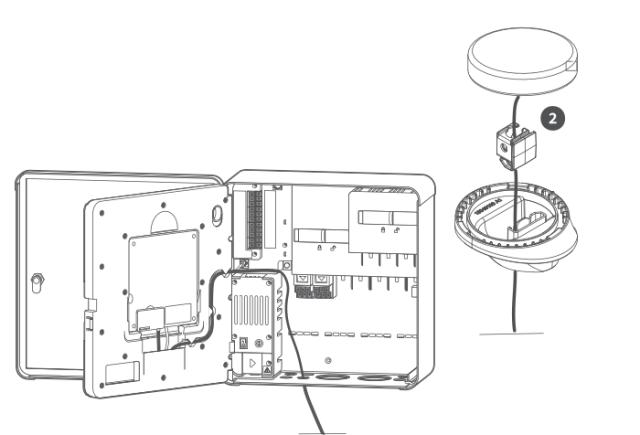
ACC2 Cellular (A2C-LTEM)
-
Remove the existing antenna from the A2C-LTEM Module.
-
Thread the male end of the extension cable to the A2C-LTEM Module.
-
Route the cable out of the cabinet to the desired mounting location.
-
Feed the other end of the cable up through the bottom of the antenna mounting base and thread onto the original antenna.
-
Position the antenna mount adapter (component #2) as shown.
- Remove the plastic film from the underside of the antenna and secure the antenna in place within the mounting base with the adhesive sticking to the base.
Note:The antenna mount cover is not used in this configuration
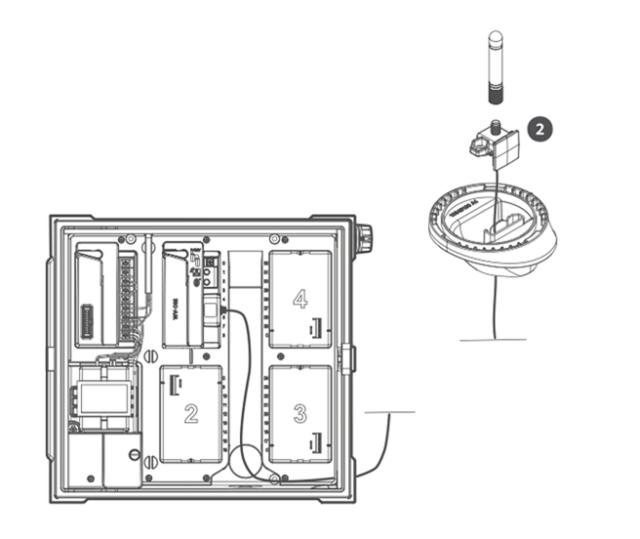
WVL LoRa Radio (WVOM, WVOM-E)
-
Remove the existing antenna from the Wireless Valve Output Module.
-
Thread the male end of the extension cable to the Wireless Valve Output Module.
-
Route the cable out of the cabinet to the desired
mounting location. -
Feed the other end of the cable up through the
bottom of the antenna mounting base.
-
Position the antenna mount adapter
(component #2) as shown, and secure the cable in place using the locknut on the connector. -
Reinstall the WVOM antenna and insert the antenna mount adapter in place within the mounting base.
-
Attach the antenna mount cover to the base by twisting the two pieces together clockwise.
Still need help? We're here.
Tell us what you need support with and we'll find the best solution for you.