Carefully drill a ½" (13 mm) hole in the top of the plastic wall mount, where indicated by the printed circle on top of the controller. Remove all plastic debris left behind after drilling. Remove the nut from the antenna assembly. Route the antenna cable through the hole and the nut. Apply RTV sealant around the hole, filling the gap between the enclosure hole and the mounting threads. Tighten the nut securely. Route the antenna cable through the track on the back of the doorframe to the module in the facepack. Leave just enough slack to allow the door to open and close without pinching the cable. Connect the cable to the module and tighten it by hand. Route the antenna cable through the hole in the bracket. Install the antenna on the bracket with the nut. Tighten the nut securely. Route the cable from the bracket through conduit down, over, and into the controller enclosure via the conduit holes in the bottom of the enclosure. Route the antenna cable through the track on the back of the doorframe to the module in the facepack. Leave just enough slack to allow the door to open and close without pinching the cable. Connect the cable to the module and tighten it by hand.
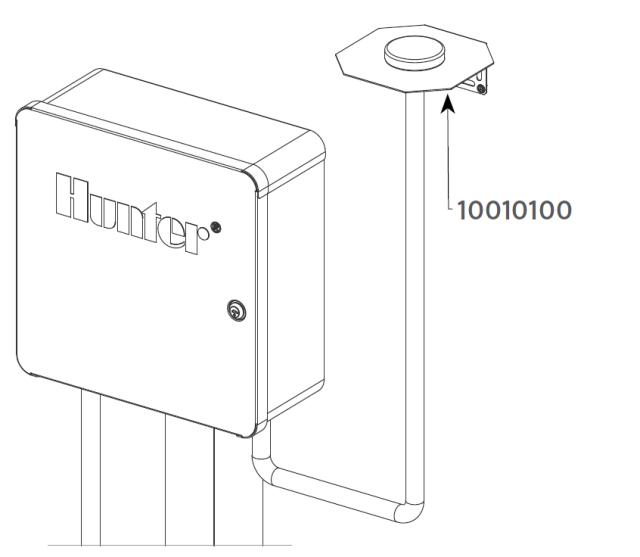
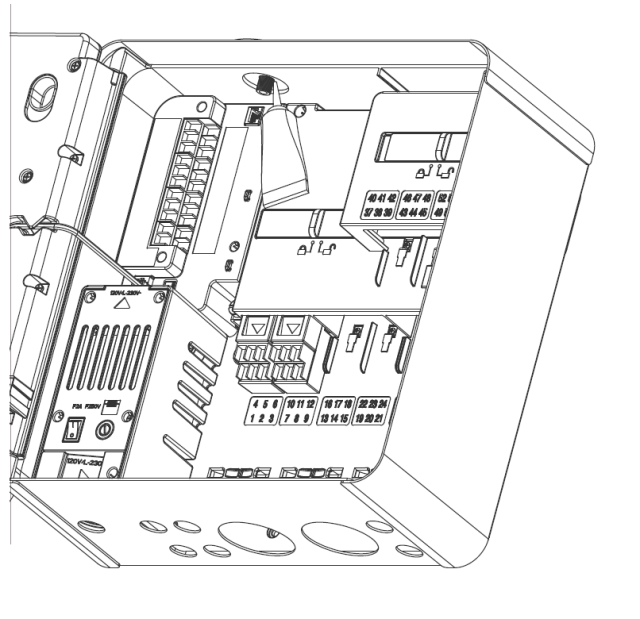
The antenna must be installed outside the controller enclosure on a metal bracket. Do not drill the enclosure directly. These installations require a Hunter model 10010100 wall bracket to complete the installation. The antenna includes approximately 9' (2.8 m) of cable. Choose a bracket mounting location that will allow the antenna cable to be routed through conduit to the openings in the bottom of the controller, and then through the track on the doorframe to the cellular module. Mount the bracket as high as possible to the wall with mounting hardware appropriate for the mounting surface. Route the antenna cable through the hole in the bracket. Install the antenna on the bracket with the nut. Tighten the nut securely. Route the cable from the bracket through conduit down, over, and into the controller enclosure via the conduit holes in the bottom of the enclosure. Route the antenna cable through the track on the back of the doorframe to the module in the facepack. Leave just enough slack to allow the door to open and close without pinching the cable. Connect the cable to the module and tighten by hand.
Metal controllers will include a hole plug assembly in a pre-drilled factory hole on top of the controller. Remove the nut on the inside of the controller to remove the plug. Route the cable through the pre-drilled hole and the antenna nut. Then tighten the nut on the antenna securely. Apply RTV sealant around the hole, filling the gap between the enclosure hole and the mounting threads. Route the antenna cable through the track on the back of the door frame to the module in the facepack. Leave just enough slack to allow the door to open and close without pinching the cable. Connect the cable to the module and tighten by hand.
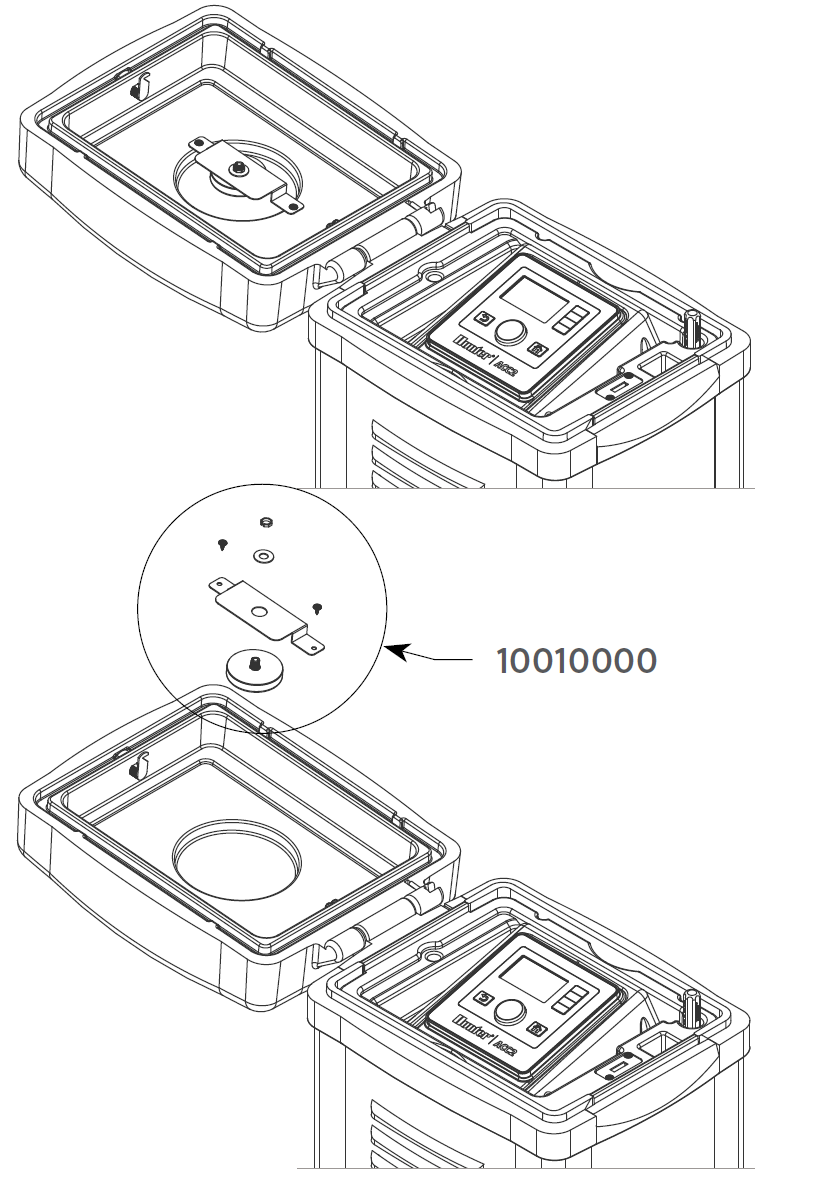
Plastic pedestal mounting requires a Hunter model 10010000 plastic pedestal lid adapter. Route the antenna cable through the hole in the bracket. Secure the antenna to the mounting bracket with the supplied nut. Use the included screws to install the bracket so the antenna protrudes into the recess in the pedestal lid, as shown. Install the plastic cable guides as shown to secure the antenna cable and prevent it from pinching the cable when the lid is closed. Route the cable down the hole to the side of the facepack frame. Connect it to the connector on the LTE module.
Still need help? We're here.
Tell us what you need support with and we'll find the best solution for you.