Considerations for Placement of the Concrete Pad
- 115v or 230 VAC power should be available
- Flight path of golf balls, golf cart travel, and other moving hazards should be avoided.
- Do not place the controller near trees or structures that may attract lightning
- Do not place the controller where sprinklers may spray upward into the controller’s vents or low areas that are subject to flooding
- Place the controller in a central location where most of the controller’s sprinklers can be seen, and station wire length can be minimized
- If the controller is equipped with a radio, avoid locations where large objects, hills, buildings, etc, obstruct the line-of-site to the central control computer.
A site survey must be conducted before installing any controller.
Mounting
- Forms should be set for a concrete base that is 22.5” (58 cm) wide x 29” (73 cm) long x 6” (16 cm) deep. The surface of the pad should be about 1” (3 cm) above grade.
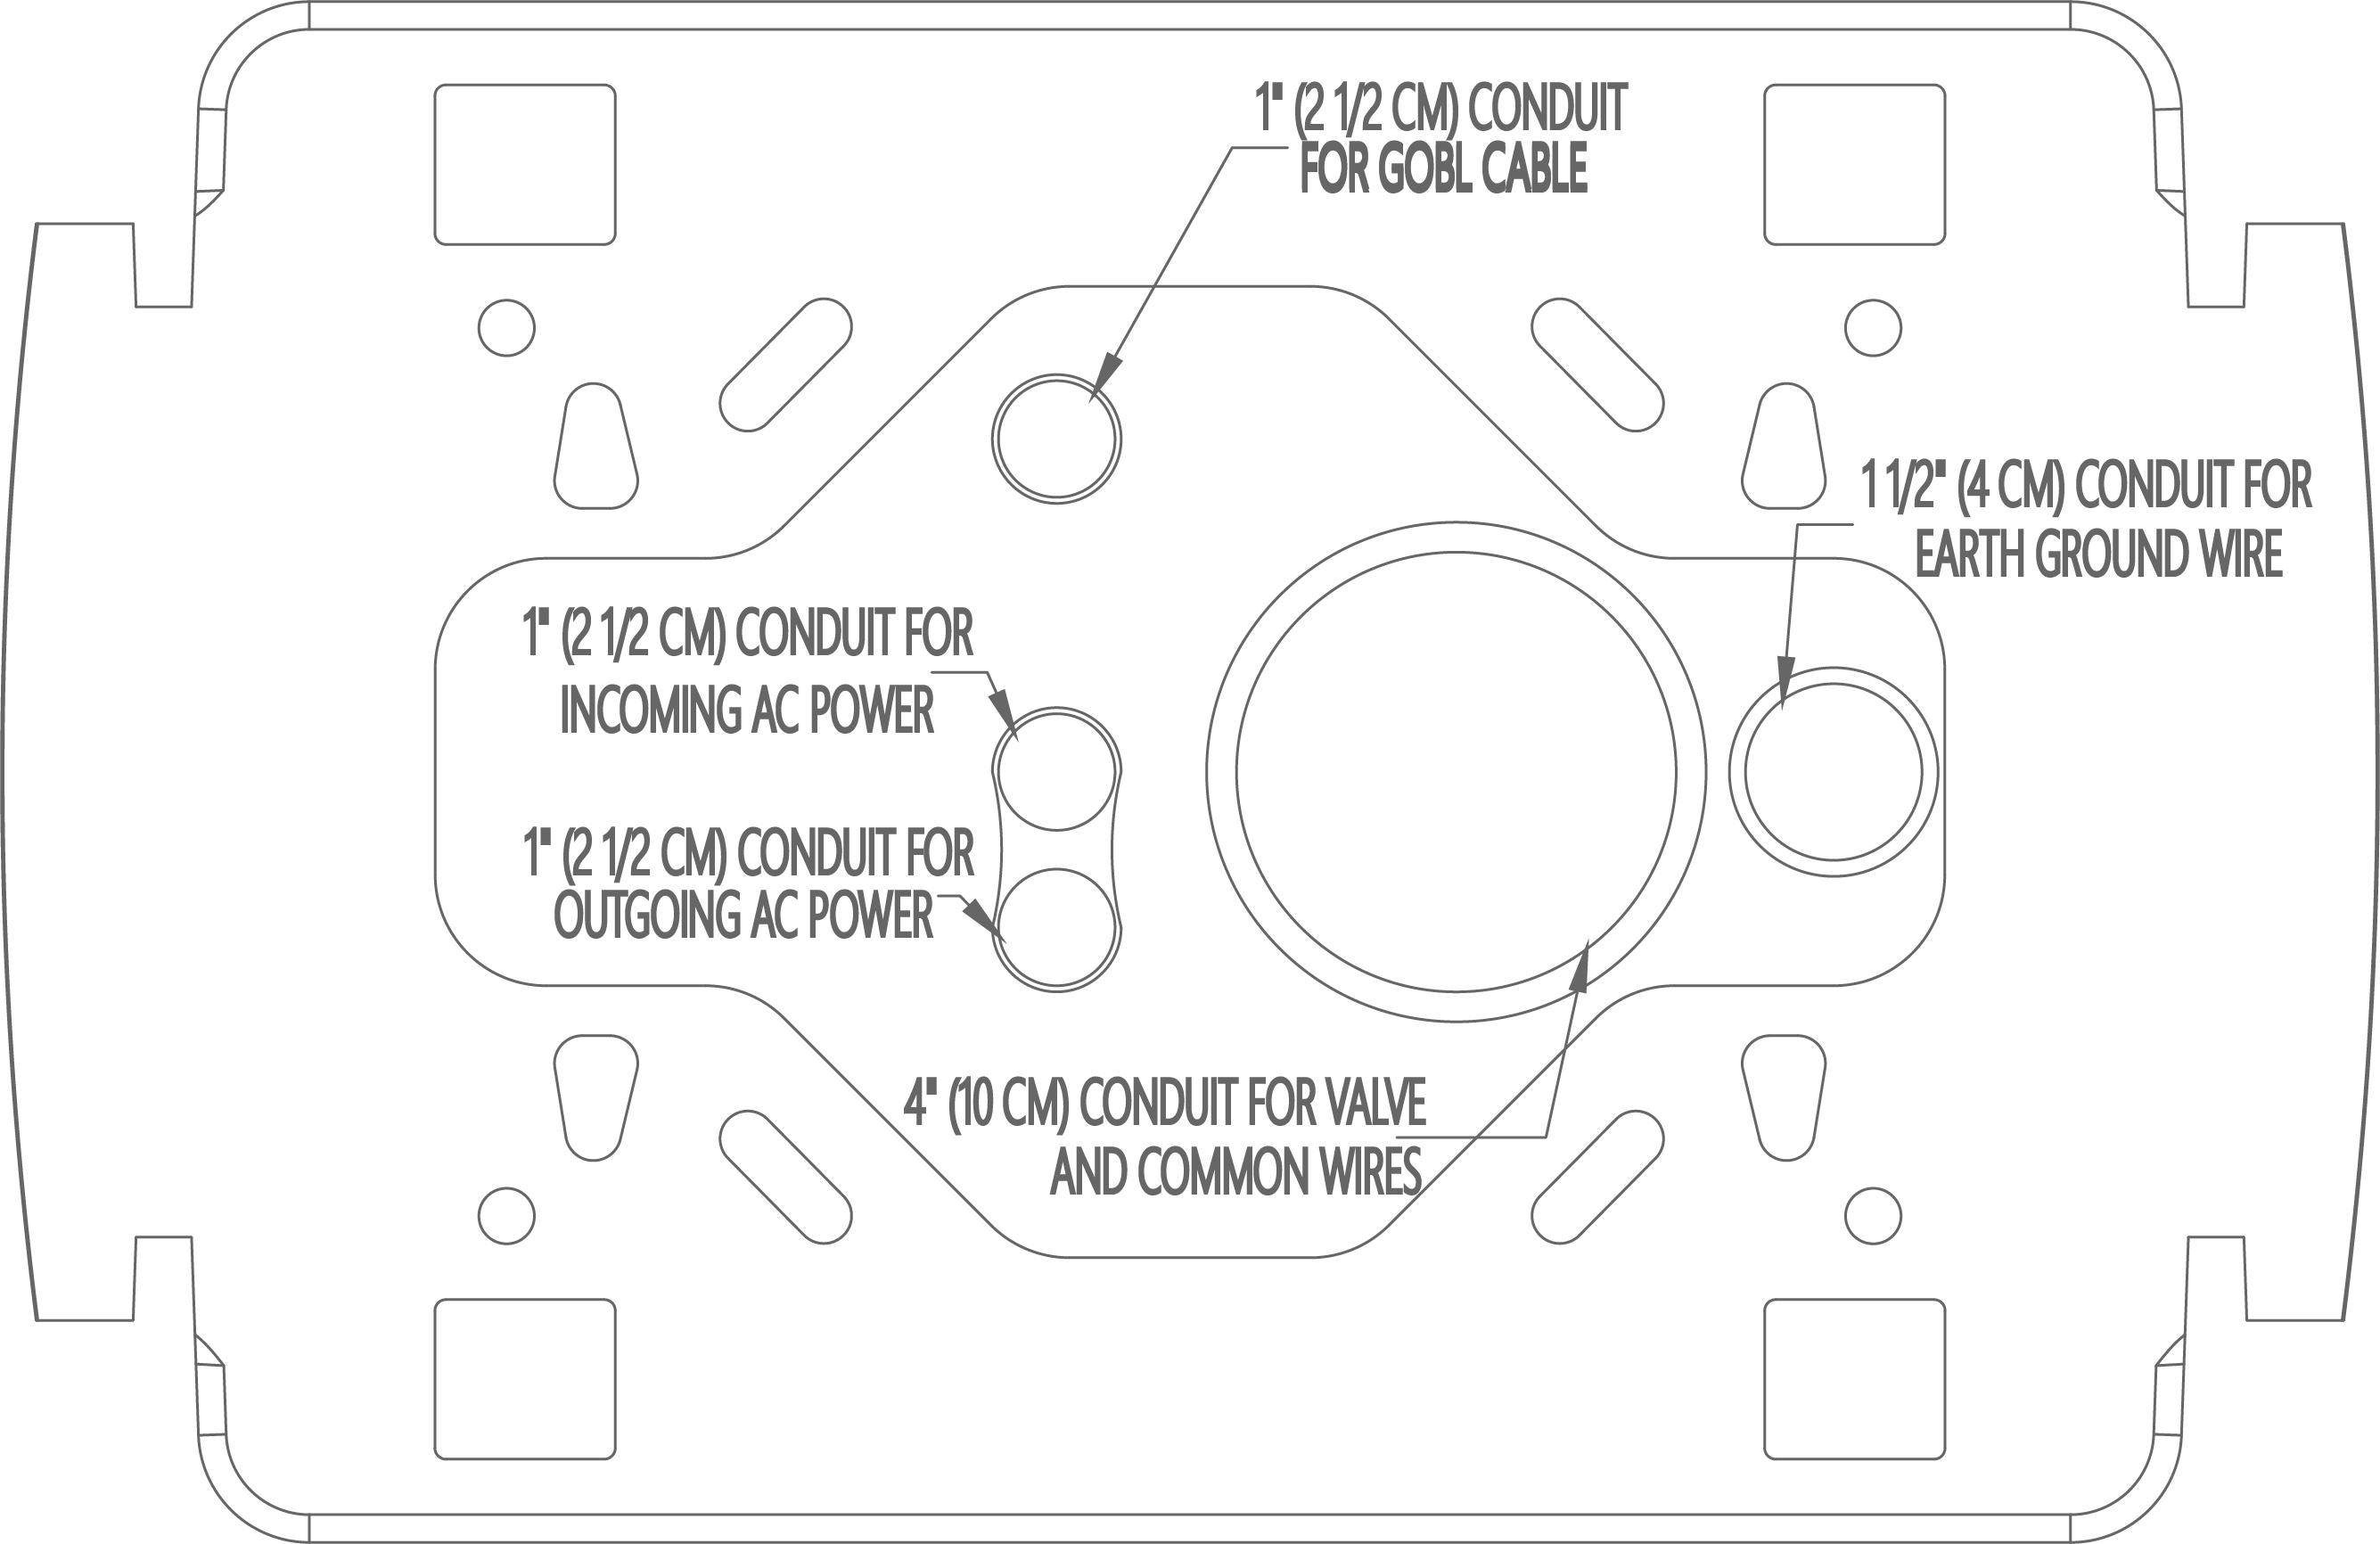
- Position a 4” (10 cm) conduit sweep elbow for the station wires and a 1” (2.5 cm) conduit sweep elbow for the incoming AC power as shown below.
- If the AC power continues to another controller, add a second 1” (2.5 cm) conduit sweep elbow as shown below.
- Position a 1.5” (4 cm) conduit sweep elbow for the earth ground wire as shown below.
- If the controller is linked to a central computer by wire, position a 1” (2.5”) conduit sweep elbow for the GCBL cable as shown below.
- Cover both ends of all conduit sweep elbows to keep debris out.
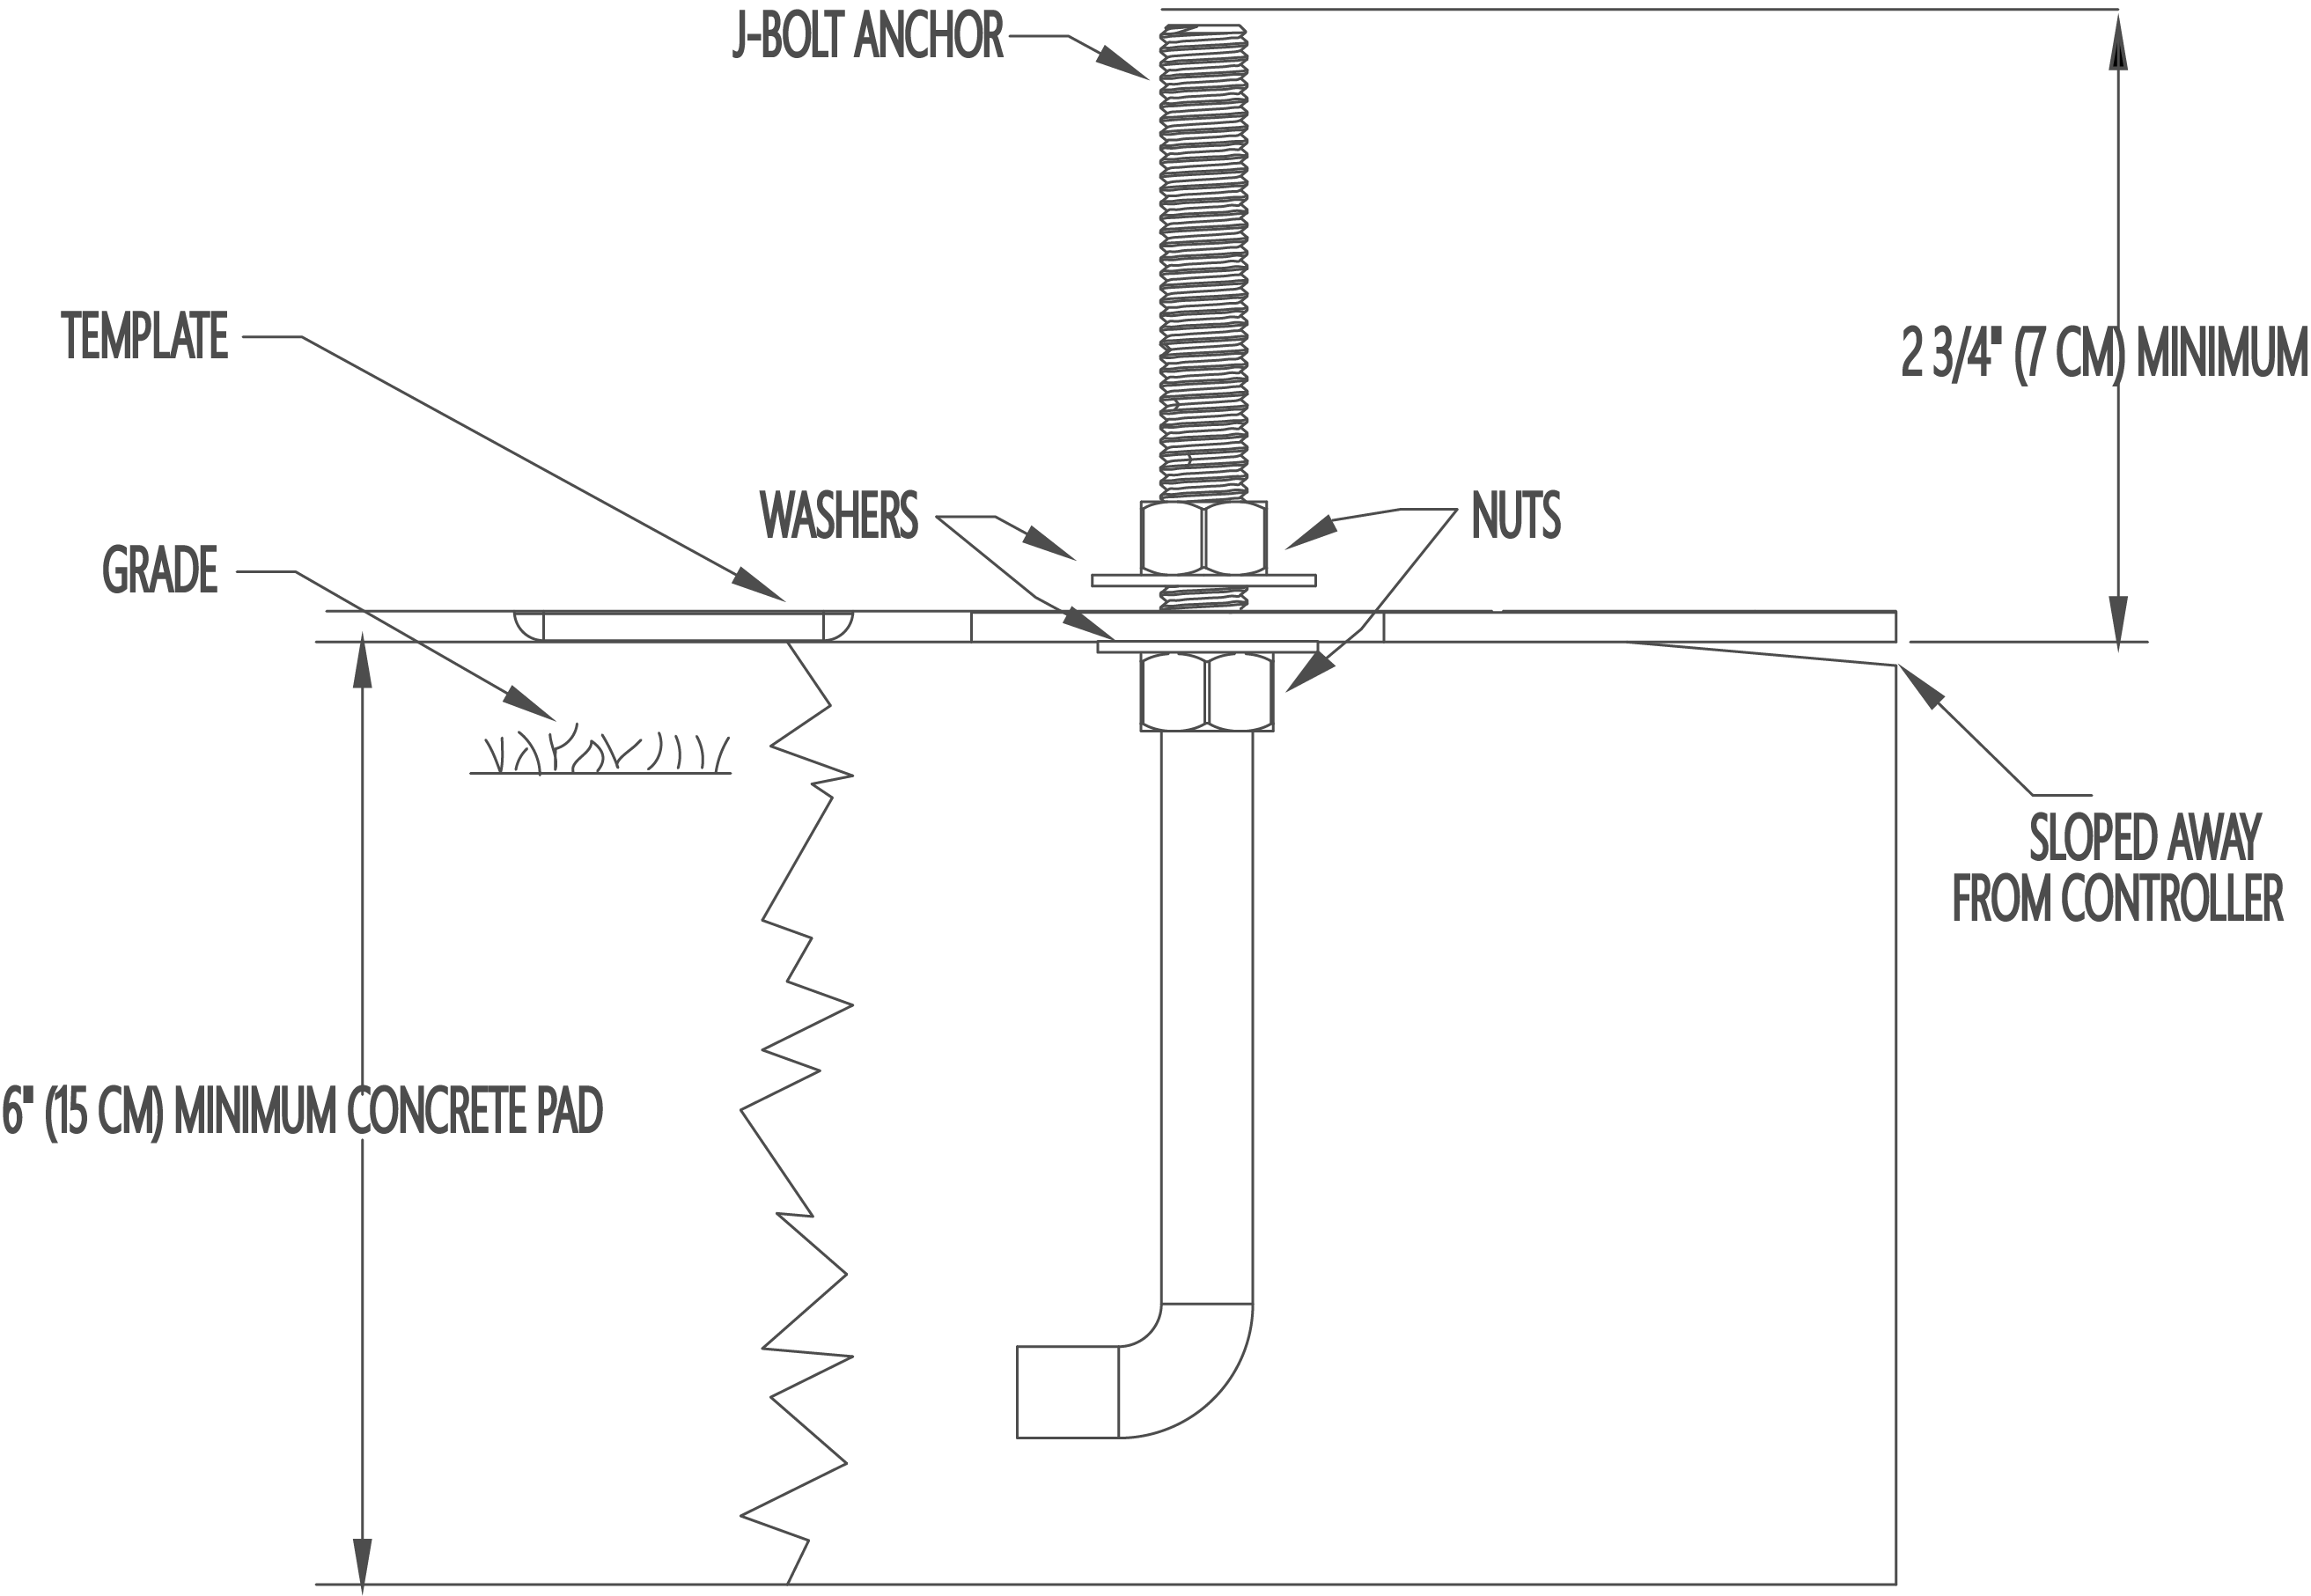
- Pour concrete into the form. Shape the pad surface to shed water away from the controller.
- Assemble the J-bolts and washers and nuts onto the template. A minimum of 2.75” (7 cm) of thread must protrude above the surface of the pad. The washers and nuts will hold the J-bolts in place so they remain in position while they are lowered into the concrete.
- Verify that the word FRONT molded into the top of the template is oriented correctly. The controller keypad will face this direction when the controller is installed. With the Pilot controller, it is possible to rotate the facepack 180 degrees if necessary.
- Using the template, work the J-bolts into the wet concrete until the bottoms of the template are in contact with the surface of the pad. Smooth the concrete, level the template, and allow the concrete to cure according to the manufacturer's instructions.
IMPORTANT: It is very important to have a smooth and level mounting surface. An uneven pad may distort the pedestal preventing the doors and lid from sealing properly.
Still need help? We're here.
Tell us what you need support with and we'll find the best solution for you.