Below you will find useful information and practical tips. If you still need assistance, please proceed to the end of the page to view our contact options. We at Hunter Industries appreciate your business and are dedicated to providing quality products and service.

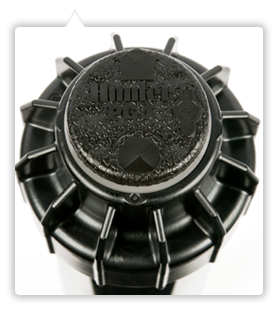


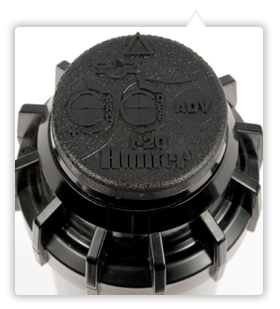
All Hunter Rotor models, including the PGM, SRM, PGJ, PGP, PGP Ultra and I-20, adjust the same way and utilize the same adjustment tool, the white Hunter wrench. The instructions you see below, as well as in the Video, "PGP Rotors Adjustment Instructions", use the PGP Rotor as an example.
Arc Adjustment

Adjustable heads are preset to approximately 180°. Sprinklers may be adjusted with water on or off. It is recommended that initial adjustments be made before installation.
- Using the palm of your hand, rotate the nozzle turret counterclockwise to the left stop to complete any interrupted rotation cycle.
- Rotate the nozzle turret clockwise to the right stop. This is the fixed side of the arc. The nozzle turret must be held in this position for arc adjustments. The right stop does not change.
- If right stop position needs to be moved, please click link below for video instructions on adjusting PGP rotor.
To Increase the Arc

- Insert the plastic key end of the Hunter wrench (click here to purchase) into the adjustment socket
- While holding the nozzle turret at the right stop, turn the wrench clockwise. Each full 360° turn of the wrench will increase the arc 90°.
- Adjust to any arc between 40° or 50° and 360°
- The wrench will stop turning, or there will be a ratcheting noise, when the maximum arc of 360° (full circle) has been reached.
To Decrease the Arc

- Insert the plastic key end of the Hunter wrench into the adjustment socket.
- While holding the nozzle turret at the right stop, turn the wrench counterclockwise. Each full 360° turn of the wrench will decrease the arc 90°.
- Adjust to any arc between 40° or 50° and 360°.
- The wrench will stop turning, or there will be a ratcheting noise, when the minimum arc of 40° or 50° has been reached.
Radius / Distance of Throw

Insert the steel hex end of the Hunter wrench into the Radius Reduction Screw. Turn the screw clockwise to decrease the radius, or counterclockwise to increase the radius. Radius can be reduced up to 25%.
Caution for PGP-ADJ: Turning the adjustment screw clockwise more than five full turns may result in a lost radius adjustment screw.
All authorized Hunter distributors can help you obtain the Hunter adjustment wrench. Find a distributor near you or refer to our online store.
Hunter rotors operate on a "gear drive" system. When in operation, water turns a small turbine in the base of the sprinkler, which drives a series of gears that cause the nozzle turret to rotate. The Hunter gear drive mechanism is sealed from dirt and debris. Age, excessive pressure, or poor water quality may eventually allow particles of contamination to enter the gear drive.
If the sprinkler is no longer rotating and the water flow coming out of the sprinkler has decreased, you can first try cleaning out the filter by removing the pop-up assembly from the main body. The cap can simply be threaded off and the internal assembly removed. The filter on the bottom of the internal assembly can be easily removed using needle nose pliers.
A worn riser seal can cause water to leak around the base of the riser stem when the PGP or I-20 is running. This can look like the sprinkler is leaking out of the top cap when the rotor is running. Or, water may be leaking from below the body cap.
The video "Replacing a Riser Seal on a Rotor" is a great tool to help you accomplish this when needed. The Hunter part number for the Seal Kit, which includes 10 riser seals and spring seat, for the PGP, PGP Ultra and I20-12 is #253400. The part number for the seal only for the PGP, PGP Ultra and I20-12 is 181500. The part numbers for the seal only for the I-20 is 252500.
Yes. Seals, rubber covers, and body caps are all available through authorized Hunter Distributors. In addition, Ewing Irrigation has a link that will take you take you to the Hunter Parts section of their website.
It's a combination drain hole and flush hole. It's a drain hole because we need to drain the water from below the nozzle turret so it doesn't push up on nozzle turret in the freezing climates. It's a flush hole because when the head is retracted, then popped up on water pressure, water goes into the hole and cleans the area below the nozzle turret.
It's likely that it leaks water because of the "drool" from the nozzle. As the screw diffuses the stream, a little of the water runs down the front of the nozzle turret and into the open area, and it's then drained out of the hole in the riser. To prevent it from happening, simply back off the screw so it doesn't diffuse the nozzle so much. If the water comes out of the hole in a "stream-like" manner, then it's likely that one of the internal seals is contaminated with debris, so the head will likely need to be replaced.
STILL NOT FINDING THE ANSWERS?
Hunter Technical Support experts are available to answer your question(s) about Hunter products and their usage, simply click on the contact button below to submit an email request.