Figure 12
Figure 13
Figure 14
Figure 15
Figure 16
Figure 17
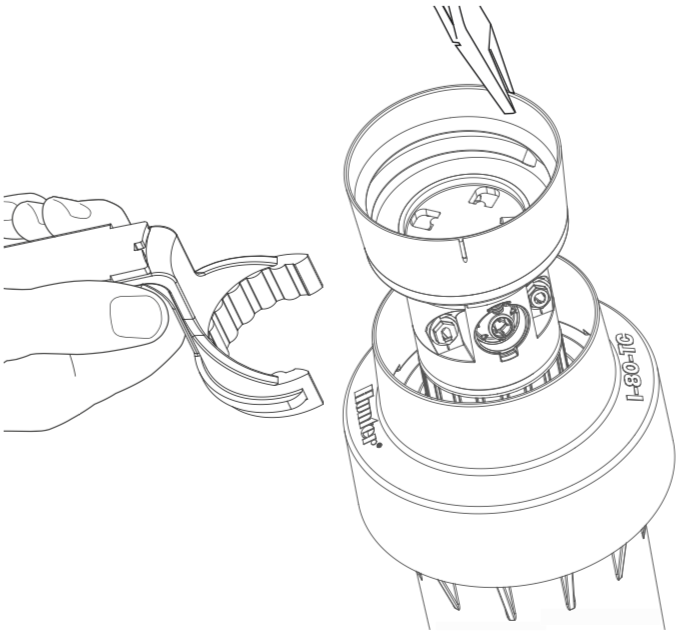
All I-80 rotors with turf cups have a removable snap ring on the body cap to facilitate easy riser assembly removal. To gain access to the snap ring, the turf cup must be removed first.
- Pull the turf cup upward using flat-nosed pliers. Hold the riser assembly in the popped-up position.
- Slide the adjustment wrench PN 991300SP onto the gray or black adjustment ring below the nozzle turret. Then release the cup downward (Figure 12 and Figure 13).
- Hold the turret with the tool in one hand and the riser and turf cup in the other. Remove the cup with a quick counterclockwise turn and lift away (Figure 14).
- Use the Hunter wrench or T-handle tool PN 319100SP to engage the pull-up socket in riser’s retainer cap (Figure 15).
- Lift the riser assembly slightly while removing the adjustment wrench PN 991300SP. Then lower the riser assembly into position (Figure 16).
Use the pop-up riser removal instructions below to complete riser removal and installation.
- To install the turf cup to the top of the riser, the cup must be correctly aligned with the top of the riser assembly.
- Locate the protruding vertical indicator on the outside of the turf cup’s vertical surface near the top (Figure 17).
- While holding the turf cup over the riser assembly, orient the turf cup’s indicator mark to the riser’s nozzle retaining screw.
- While maintaining this orientation, place the turf cup onto the top of the riser. Then turn quickly clockwise to lock the cup to the riser.
Still need help? We're here.
Tell us what you need support with and we'll find the best solution for you.