The HC is designed for indoor installations only. The chosen location must have Wi-Fi coverage. Wi-Fi coverage can be easily tested using a smart phone with Wi-Fi connectivity or on the HC itself (signal strength is shown when you select a wireless network).
Note: The HC Controller is an indoor model and is not water-proof or weather resistant, and must be installed indoors or in a protected area.
Note: Do not plug transformer into power source until controller is mounted and all wiring has been connected.
Cable Entry
The controller has 2 cable entry options -- from the rear of the case or via a conduit from the bottom of the controller.
Entry from the rear of the controller
Using a sharp knife, remove the 2 cutouts on the rear of the controller as indicated on the diagram as ![]() .
.
Entry via ¾ inch conduit
Using a sharp knife, cut around the semi-circular line on the controller as indicated on the diagrams as ![]() . Cut around the matching line on the blue controller wiring cover.
. Cut around the matching line on the blue controller wiring cover.
Mounting the Controller
- Using a drill bit of 3/16 inch diameter, drill a hole to a depth of 1 inch (25 mm).
- Insert plastic anchor so it is flush with the surface of the wall.
- Screw 1 inch screw into plastic anchor leaving the head protruding about 1/8 inch (4 mm).
- Slide the controller case over the screw head.
- Mark second mounting point (see
 in diagram), remove controller, drill hole, insert plastic anchor, slide controller case over first screw head and screw into place.
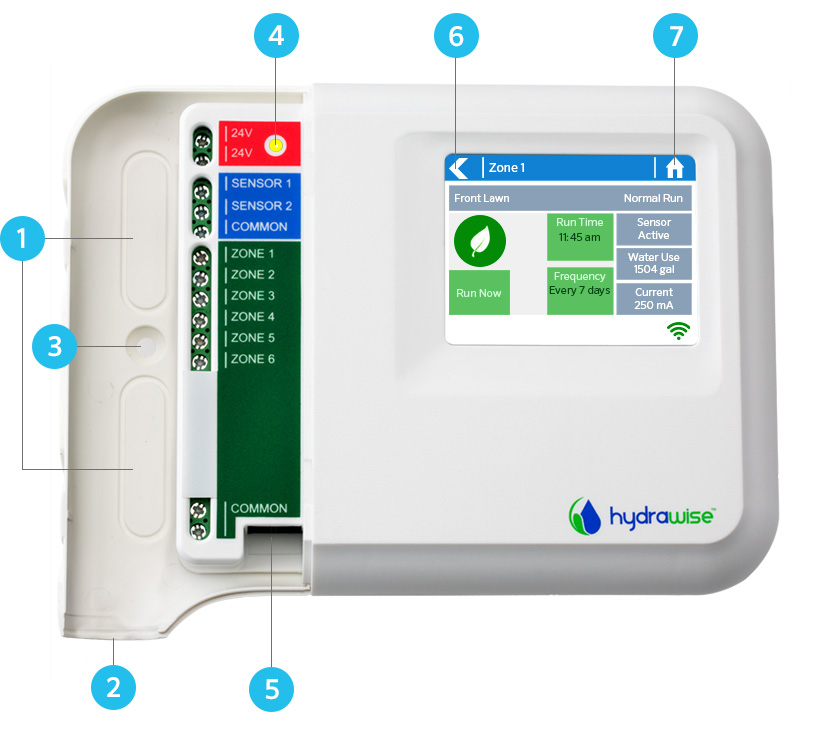
![]() Rear cable entry point (remove with knife)
Rear cable entry point (remove with knife)
![]() Conduit cable entry point (remove with knife)
Conduit cable entry point (remove with knife)
![]() Wall mounting screw hole
Wall mounting screw hole
![]() Power indicator
Power indicator
![]() Expansion module cable entry
Expansion module cable entry
![]() Go to previous screen
Go to previous screen
![]() Go to home screen
Go to home screen
Still need help? We're here.
Tell us what you need support with and we'll find the best solution for you.