Below you will find useful information and practical tips. If you still need assistance, please proceed to the end of the page to view our contact options. We at Hunter Industries appreciate your business and are dedicated to providing quality products and service.
Residential Spray Bodies / Nozzles / MP-ROTATOR Identification Chart

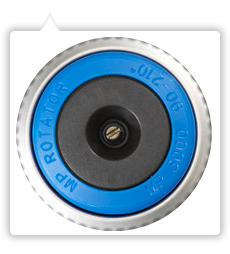


The distance of coverage for the MP rotator is dependent upon incoming pressure. If you are not achieving the distance you desire check your incoming water pressure at the sprinkler head. See the performance charts at the bottom of this page for pressures and corresponding radius.
If you are not able to adjust the radius down to low end of range, then the incoming pressure may be too high for the minimum desired radius. Use the Pro Spray PRS30 (PROS-PRS30) to maintain 30 psi at the MP Rotator nozzle for minimal radius options. Use the PRS40 (PROS-PRS40) to maintain 40 psi at the MP Rotator nozzle and for optimal performance and distance.
MP rotators have a lower precipitation rate than spray heads, so your run times need to be lengthened. Your run times with MP rotators may be two to three times longer than a standard spray zone. This is because the MP Rotator puts water down at a lower rate resulting in a significant reduction in runoff, thus saving large amounts of water.
The MP 1000, 2000, Strips, and Corner models include a standard pre-installed 40 mesh (425 microns) filter. The MP3000 comes standard with a 20 mesh (850 microns) filter. With MP Rotators, 80% of filter can be plugged without performance drop. MP rotator filters can be removed for cleaning or replacement.

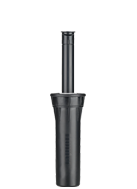
Pro Spray Shutoff Cap P/N 213600
You cannot shut off the spray on the MP rotator nozzle using the adjustment screw. To shut off spray to one head within a zone you would need to either cap off the head or install a standard spray nozzle on pop-up body and turn the adjustment screw all the way down to shut off flow.
Pop-up sprinklers require water pressure to "pop up." Either a broken irrigation pipe or worn sprinkler wiper seals will cause loss of water pressure. To determine which is causing the problem, turn the sprinklers on, then pull up on any sprinkler within the zone in question. Let the system run for a while. If, by pulling up the sprinklers, the system is watering correctly, you'll need to change out the wiper seals on the sprinklers. If you notice water spurting out of the ground where it shouldn't be, there may be a broken irrigation pipe.
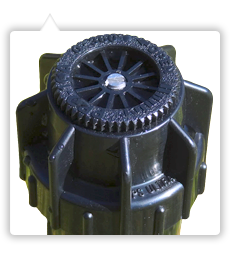
The most common reason a pop-up sprinkler "sticks up" is because debris is in the pop up body, the riser is damaged, or the riser seal is worn.
To fix this:
- Unscrew the body cap
- Pull out the sprinkler assembly
- Examine the parts
- Clean out debris
- Replace parts if necessary
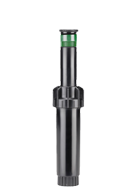
By turning the center adjustment screw on the nozzle fully to the right position, the flow will stop. The sprinkler head will still pop-up, but no water will flow out of the nozzle.
There are two reasons why there might be a wet spot around your sprinkler:
- The most common reason is called "Low Head Drainage." This is when the lowest head on the zone leaks the water from the piping out the sprinkler. Eventually, the water leak will stop after all the water has leaked out of the pipe. To fix low head drainage, install check valves on the sprinklers or in areas with extreme elevation change, you may need an HCV underneath the sprinklers exhibiting this issue.
- Another reason may be water leaking through the valve. Note: A check valve in the sprinkler will not fix this leak. Typically, water will leak through a valve because debris is in the valve. To fix this, you'll need to disassemble the valve, rinse all the parts with clean water, and re-assemble the valve. If you cannot locate your valve boxes or fix the valve, it is recommended you contact the contractor who installed the system or use our Professional Contractor Referral link to help find a contractor in your area.

Capping or removing a sprinkler is done differently depending on whether or not you live in an area that freezes and requires the irrigation system to be winterized. Winterizing your irrigation system involves draining or blowing the water out of the system with compressed air to prevent freeze damage.
Use these instructions if you live in an area that does not require winterization:
- To cap off a sprinkler, dig up the dirt around the head you want to remove so you expose the pipe and fittings below.
- Unscrew the sprinkler and any piping connecting the sprinkler to the fitting below.
- Install a cap or plug of the appropriate size or thread to stop the water from flowing out of the fitting after the sprinkler is removed.
- Turn on the irrigation to check for leaks before burying the pipe and fitting
Use these instructions if you live in an area that does require winterization:
If the sprinkler you want to remove is the last one on the pipe, you will need to locate the sprinkler that is "upstream" (closer to the source of water from the sprinkler you want to remove) and cut and cap the pipe there. Capping the pipe at the upstream sprinkler prevents a "dead end" of pipe that would fill with water but not have any outlet. During winterization, the water would be trapped in the "dead end" and may potentially freeze and break the pipe.
- Dig up the pipe and fitting under the upstream head.
- Cut the pipe just past the tee fitting leaving enough pipe sticking out of the tee to cap it.
- Dig up the dirt around the sprinkler you want to remove and unscrew it from the fitting beneath it. The pipe can be abandoned, as it is no longer connected to the irrigation system.
- Turn on the irrigation to check for leaks before burying the pipe and fitting.
Note: Teflon tape is recommended when using a threaded cap.
If temporary shutoff is all that's necessary, a shutoff cap could be used on Hunter Pro Spray model pop-ups.
Pro Spray Shutoff Cap pictured (P/N 213600)
For adjustable arc nozzle, hold the nozzle arc stationary with fingers or with the two pins on the side of the Hunter wrench between any of the nozzle spokes. Adjust the radius with a flat-bladed screwdriver by turning the center screw clockwise to reduce the radius. For fixed arc nozzle, adjust the radius with a flat-bladed screwdriver by turning the center screw clockwise to reduce the radius.
The Hunter Adjustable Arc nozzles come from the factory with a preset arc of 25°. Before setting the left side of the arc, first set the right ratcheting side by twisting the riser assembly inside of the sprinkler body, aligning the right side of the spray pattern into the proper area. The raised dot on top of the nozzle indicates the adjustable (left) edge of the spray pattern.
- Hold the perimeter of the nozzle with fingers and turn the nozzle counterclockwise to increase the arc
- To decrease the arc, hold the perimeter of the nozzle with fingers and turn the nozzle clockwise
STILL NOT FINDING THE ANSWERS?
Hunter Technical Support experts are available to answer your question(s) about Hunter products and their usage, simply click on the contact button below to submit an email request.